The making of Pyztec: An experimental Python based Aztec barcode Encoder/Decoder

Introduction
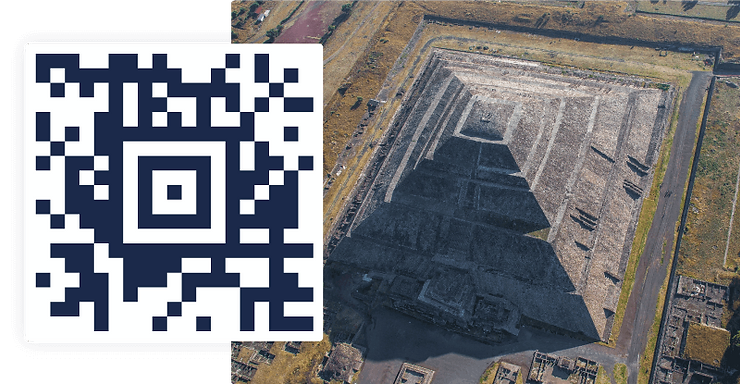
I have always been fascinated by barcodes. Ever since I was a child, I was constantly in awe of how 1D and 2D barcodes work. How can a moving conveyor belt scan a airport luggage so easily no matter what the location or rotation is. On my way back home from Kedarnath, I looked at my boarding pass and the QR code caught my eye. It wasn’t exactly a QR code. It looked quite different.

This naturally piqued my curiosity and I immediately googled what it is. Soon, I discovered that its known as an Aztec Barcode. And airlines use it because Aztec barcodes are more durable in a printed paper than QR codes as the edge of a paper is more likely to tear than in the center.
Github: ronniebasak/pyztec: AZTEC Decoder written using pure python, freely usable dependencies. (github.com)
Why I decided to write Pyztec
This brought back memories of the days when I used to be fascinated by barcodes and I decided to take a crack at it. I wanted to write my own Aztec encoder/decoder in python as would not only force me to learn all the specifics, but it will also prompt me to understand and write coherent code based on my understanding.
The challenges involved in creating an Aztec barcode Encoder/Decoder
The biggest challenge IMO was finding information. The ISO/IEC 24778:2008 filing exists but it is damn expensive. The wikipedia article, while complete provides only a basic understanding of aztec barcode and does not provide working knowledge. I found this excellent video that explained the Aztec barcode really well, with an example, and then the tables in wikipedia started to make sense.
How I went about writing code for Pyztec
I started with writing the decoder first followed by the encoder
Aztec Decoder and Pyztec implementation
When creating an Aztec Decoder, we first need to look at the metadata that is present in the first ring. The first 1-pixel ring contains 4 unique markers in each corner, it helps us to identify any rotation or relfection that can be corrected. And it also contains a 28- or 40-bit mode message that contains some metadata such as codeword size, number of codewords and reed-solomon messages etc.
We then take the mode message, extract metadata required for decoding, and initialize decoding parameters. Then get all the codewords and perform a reed-solomon error correction step.
After the error correction is complete, we unstuff the codewords and form a binary string. Then, we break the string in chunks and start decoding each character, byte and code from the chunk as we read it.
The challenges I faced
The biggest challenge I faced was documentation and information. It was very, very scarce. There were moments I didn’t think I would be able to solve it. From downloading outdated documentation to watching a sketchy youtube video, who got the information from a russian document; It was very difficult. And there was no way I would pay $200 for the ISO/IEC 24778:2008 copy.
Then, I had to solve the peculiar way Aztec reads and writes the data in spirals. It reads in a zigzag pattern, starts from the top left and follows a 2x3 pattern, and it switches direction everytime we hit a corner.
I had to figure out the tables, encodings and decoding information as it turns out; aztec doesn’t support typical ASCII encoding. Well, technically, it does support byte-level encoding but it prefers everything in 6bits and it can store a lot more information that way.
I had to not only understand the custom encoder/decoders for aztec barcodes, but I had to write them. And only at this point I understood a lot of concepts around encoding/decoding.
Next up, error correction. While reed-solomon error correction is something I heard about, I never really cared about the specifics. Turns out, I had to. I had to specify different prime constants pertaining to different polynomials and codeword sizes and in the process I learned about galois fields as a side effect.
The decisions I made along the way
The biggest decision I made, was not to overcomplicate things. I can make infinite number of improvements to this; but I didn’t want to make it perfect. I wanted to get it working, get it functionally complete and then refactor.
On that, I decided not to use “bitstring” library because I was unfamiliar. Without this, I am wasting 7 times memory by storing each bit as a character, but I didn’t really care. Because even the biggest aztec barcode supports 22801 pixels. And even if every bit needs 1 byte, I hardly allocate 23KB of RAM - the python interpreter allocates way, way more than that.
Up next, I had to decide on how to encode and decode the different character sets, special characters, and I made the decision based on how practical it was and how good it was. For example, I made an enum class called SpecialChars, that I am proud of. But I am not proud of creating a global dictionary that contains all the codewords and mappings to the corresponding characters.
Conclusion
It was a lot of fun to have built an working aztec 2D barcode encoder/decoder. This is just the beginning, I want to make a functional aztec reader using the solution I develop eventially. And I intend to port it over to Rust eventually.
Stay tuned, Stay curious.
Signing off, Sohan.


